Make Santa Jump - Making an endless runner game in F# using MonoGame
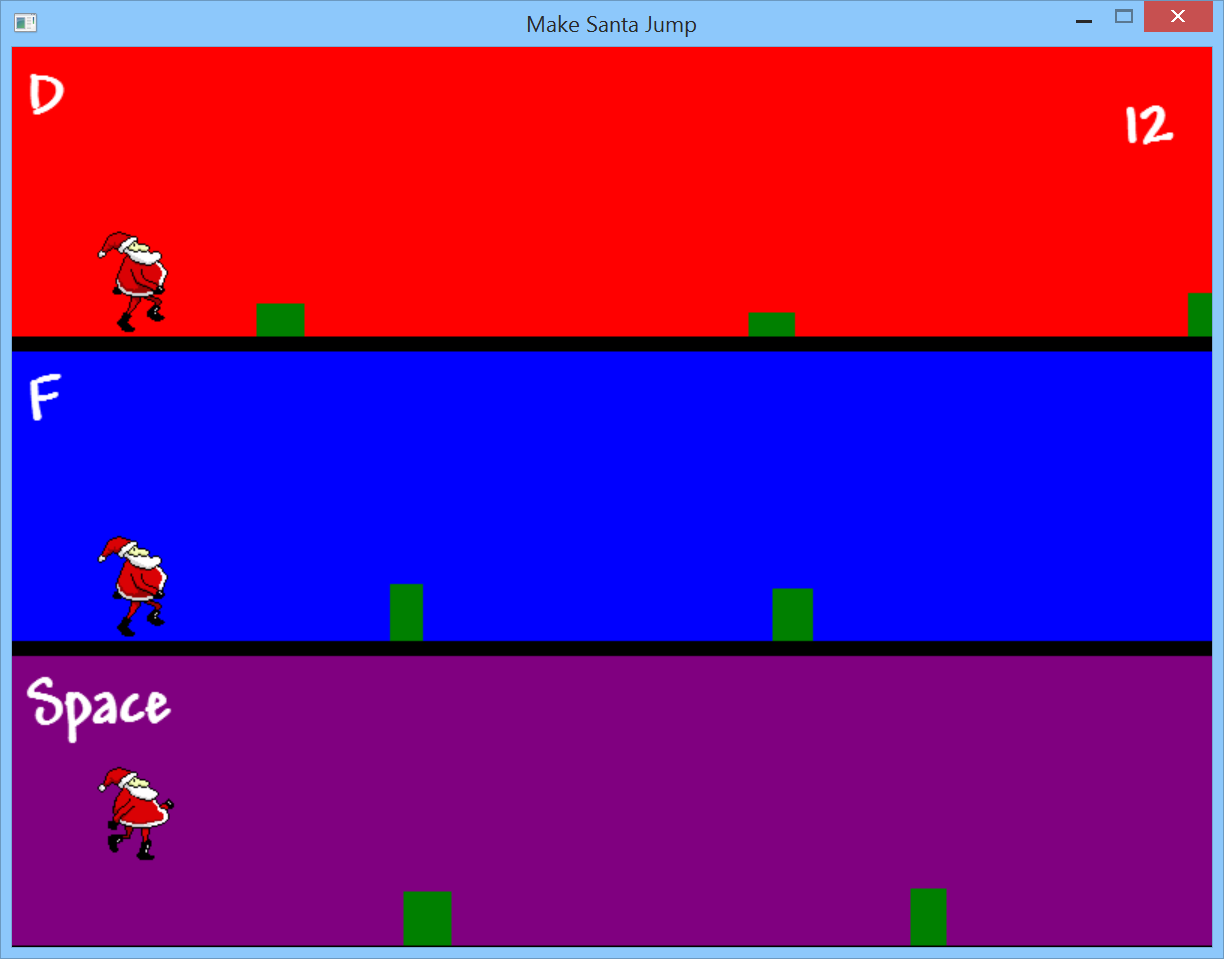
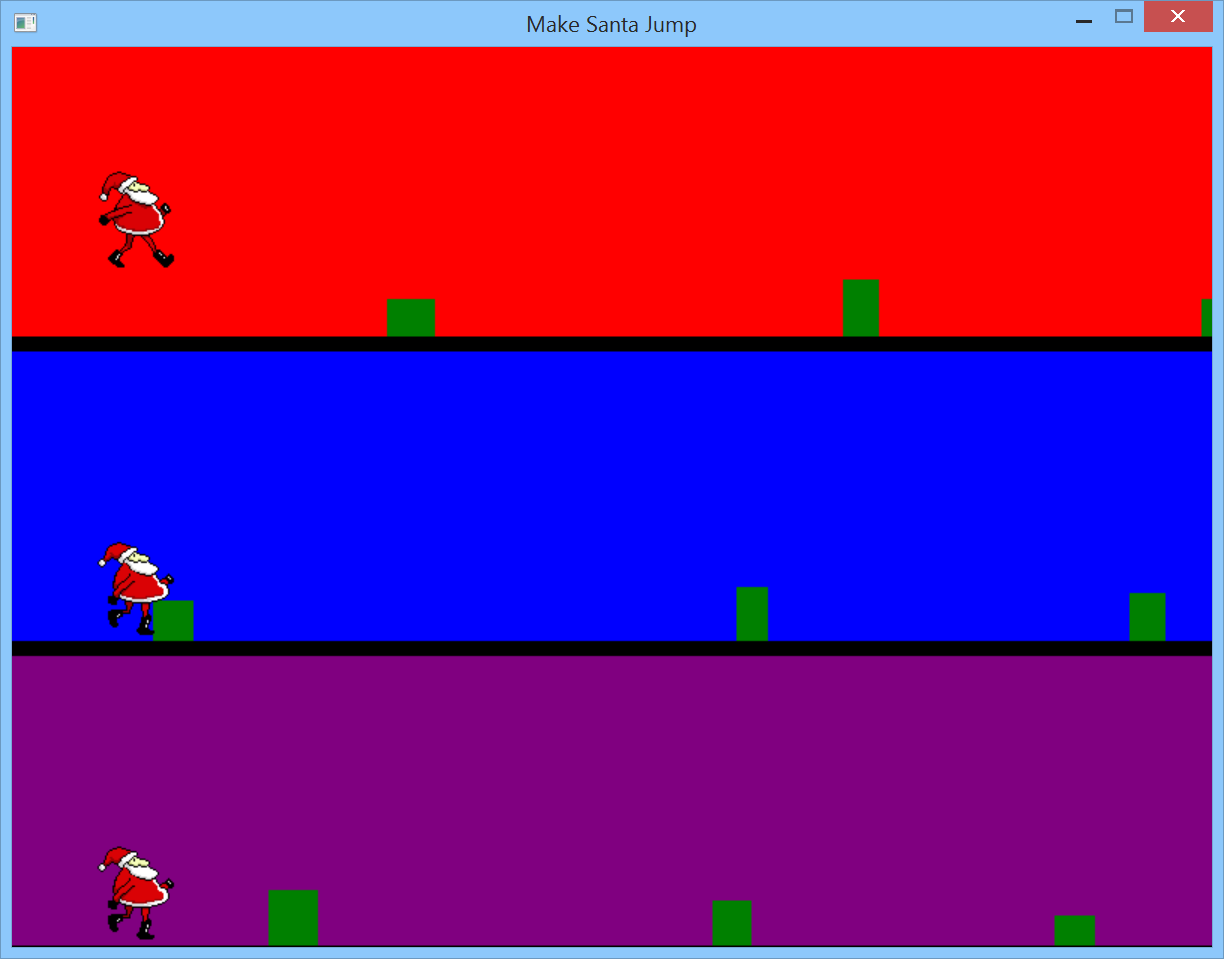
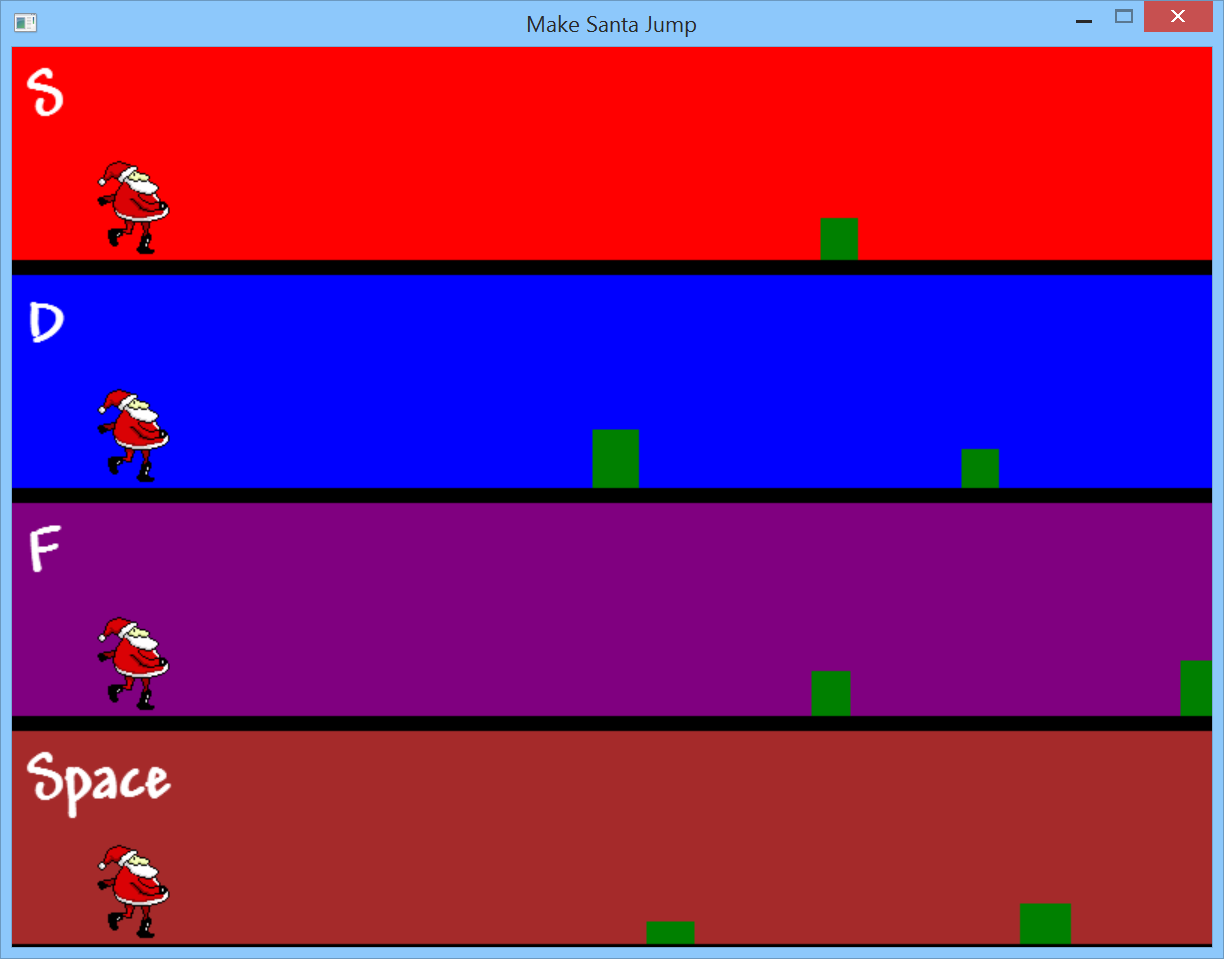
It’s the holiday season, so let’s make a game. Here’s what it will look like:
It looks even better in action, if that’s possible. And for a game that’s taken about 5 hours to put together, it’s pretty fun to play, if I do say so myself. Here’s a short, poor-quality video that I took with my phone (it’s harder than you might think to take a video with one hand while playing a game with the other hand):
For the last couple of months, I’ve been addicted to Make Them Jump, an awesome game for iOS (and Android). When Sergey Tihon asked for volunteers for the F# Advent Calendar, I knew I wanted to do something related to games, and I decided it would be fun to make a Santa-themed clone of Make Them Jump. Unlike some of the other #fsadvent entries, the code for this game is not particularly clever or advanced; but the end result is, hopefully, enjoyable.
Before we go any further, I recommend that you download the finished game from GitHub (download “MakeSantaJump.Windows.zip” to get the pre-built binaries) and try it out yourself. There are 5 difficulty levels; on the menu screen, press the number key corresponding to the difficulty. Then press the key in the top-left corner of each panel (Space, F, etc.), to make the corresponding Santa jump. Try to get as high a score as possible! And then leave your score and difficulty level in the comments below :)
If you manage to score more than 0 on the highest difficulty level, you’re doing great ;-) In keeping with the original, I’ve pitched the difficulty somewhere between “fiendish” and “nightmarish”.
Okay - now that you’ve (hopefully) played the game, you’ve got a good idea of what we’re going to build. We’re going to write the game from scratch, step by step, using MonoGame. Or put another way, we’re going to write the game from scratch, using only A HIGH LEVEL LIBRARY THAT DOES BASICALLY EVERYTHING FOR US.
If you haven’t worked with F# much or at all before - no problem. I’ll include all of the necessary code here, and we’ll work our way right from the beginning to the end.
Our whole game will be only 300-ish lines of F# source code. Let’s get started!
File > New > Project
I’ve made the assumption, for the purposes of this tutorial, that you’re using Windows. As I mention at the end of this post, the game should work without too many modifications on Mac and Linux, but for now, it will be easiest to follow along if you’re on Windows.
I’m also assuming, if you’re reading this, that you already have Visual Studio installed. If not, grab the free Visual Studio Community 2013 and install it.
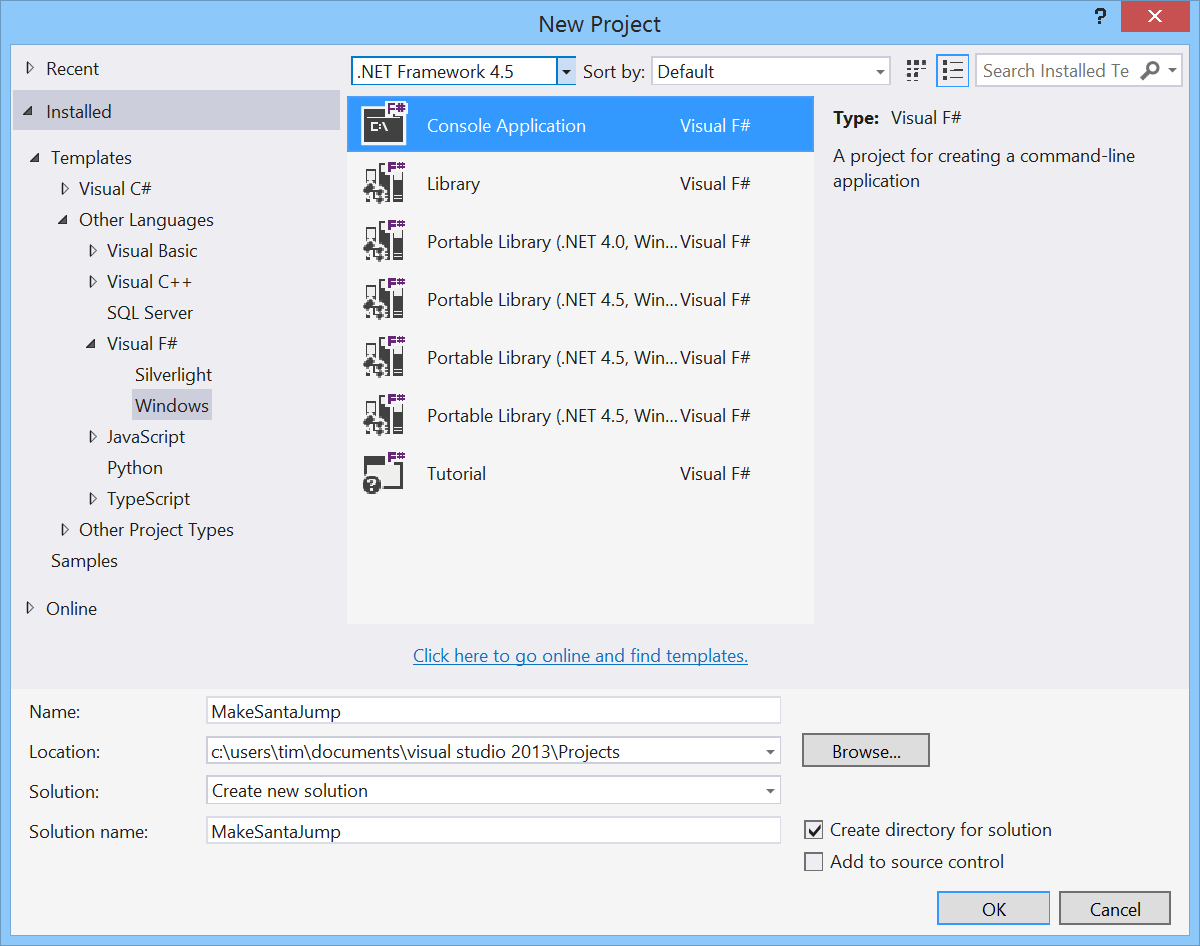
Go to File > New > Project. On the left, under Templates, choose “Other Languages”, then “Visual F#”. Choose “Console Application”, give it a name, and click OK.
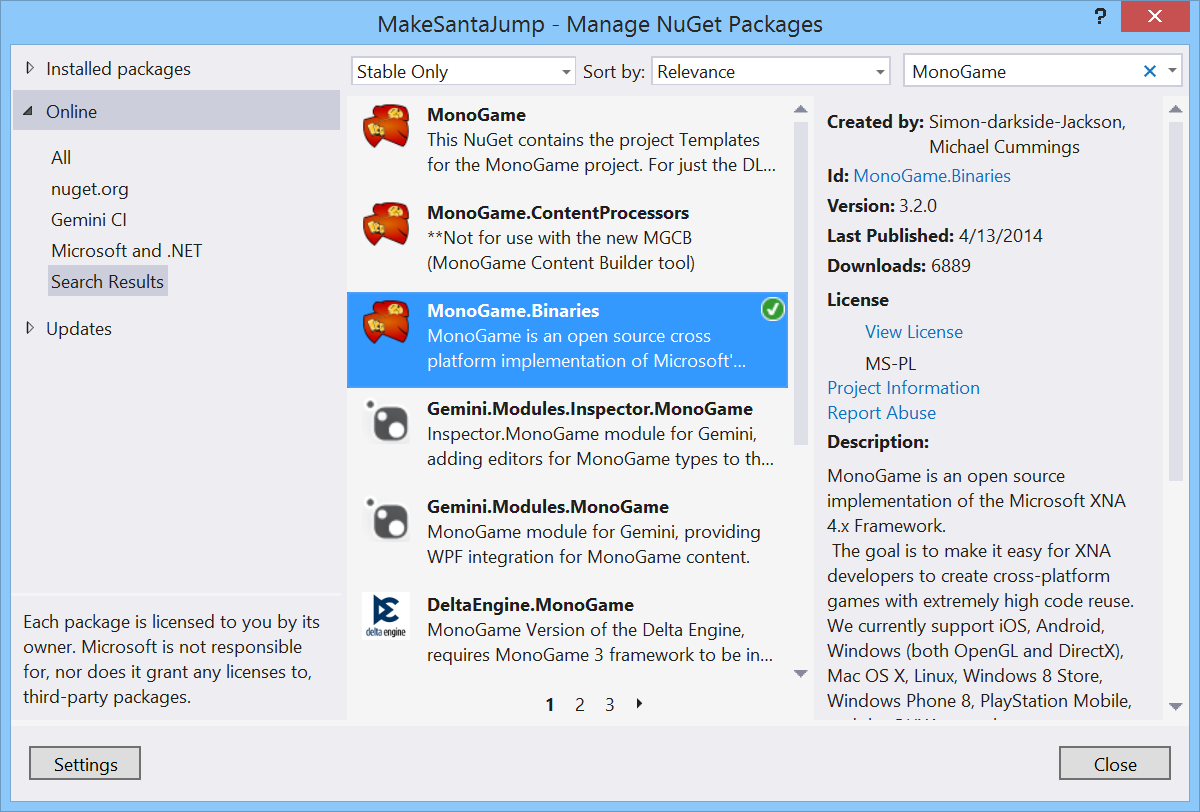
We’re going to use MonoGame. In Solution Explorer, right-click on “References”, and click “Manage NuGet Packages…”. Search for “MonoGame”. The package you want is MonoGame.Binaries. At the time of writing, the current version is 3.2.0. Click “Install”, wait for it to install, and then click “Close”.
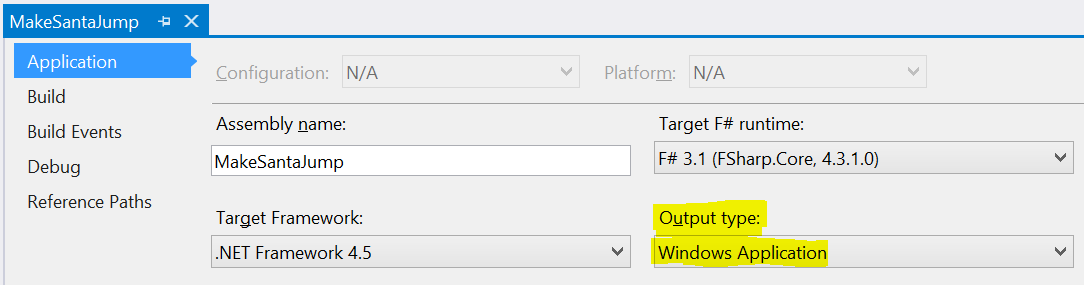
Next, right-click on the project in Solution Explorer, and click “Properties”. In the Application tab, change the “Output type” to “Windows Application”. (I don’t know why there isn’t a Windows application project template, which would save us this step. If we leave it as Console Application, it will still work, but it will show a console window behind our game window.)
We’ll write all our game code in a new file, and keep Program.fs mostly empty. Right-click Program.fs, then “Add Above” > “New Item…”. Call the new file Game.fs. Replace the contents with this code:
module MakeSantaJump

open System.Collections.Generic
open Microsoft.Xna.Framework
open Microsoft.Xna.Framework.Graphics
open Microsoft.Xna.Framework.Input

type MakeSantaJumpGame() as this =
    inherit Game()

    do this.Window.Title <- "Make Santa Jump"

    let graphics = new GraphicsDeviceManager(this)
    do graphics.PreferredBackBufferWidth <- 800
    do graphics.PreferredBackBufferHeight <- 600

    override this.LoadContent() =
        ()

    override this.Update(gameTime) =
        ()

    override this.Draw(gameTime) =
        this.GraphicsDevice.Clear Color.Black
Now open Program.fs, and replace the contents with the following code:
open MakeSantaJump

[<EntryPoint>]
let main argv =
    use g = new MakeSantaJumpGame()
    g.Run()
    0
Hit “Start” in the toolbar, or press F5, to run it. You should see an 800x600 window, cleared to black. That was easy, right? MonoGame, like XNA before it, makes it exceptionally straightforward to get something on the screen. Especially if that “something” is… an empty window.
![]()
Obstacles
Now that we’ve got an empty window on the screen, let’s take a step back and talk about the game. As Santa runs, obstacles (well, green boxes) appear in his path, which he needs to jump over. It might look like Santa is running to the right, with the obstacles in fixed positions on the track. But I’ve chosen a simpler method: Santa runs in place, and the obstacles move left towards him. When the obstacles reach him, he needs to jump. Then the obstacles disappear off the left edge of the screen.
To generate new obstacles, I’ve gone with an equally simple strategy: when the obstacle we added most recently appears at the right edge of the screen, we generate a new one, beyond the right edge of the screen.
Each frame, all the obstacles are moved to the left by a small amount.
Let’s write some code. You’ll notice that I’ve gone with a hybrid object-oriented / functional approach, which might be controversial. (If any F# gurus are reading this and can suggest ways to improve the code, please let me know! I originally tried to make it purely functional, but games are basically all about mutating state, and the code ended up looking quite messy, with “global” variables being passed in to every function.)
First, add these lines of code to the top of Game.fs, just below the open statements. We don’t need all of them yet, but for simplicity we’ll add them all now.
// Change these values to alter game balance.
let gravity = 0.03f
let speed = -0.3f
let minObstacleWidth = 20
let maxObstacleWidth = 35
let minObstacleHeight = 15
let maxObstacleHeight = 40
Here’s the code for our Obstacle type. Add it below the let statements you just added:
type Obstacle(startX, width, height) =
    let mutable x = startX

    member this.Visible
        with get() = int(x) + width > 0

    member this.GetBounds(trackBounds : Rectangle) =
        Rectangle(int(x), trackBounds.Bottom - height, width, height)

    member this.Update(deltaTime) =
        x <- x + speed * deltaTime

    member this.Draw(spriteBatch : SpriteBatch, texture, trackBounds : Rectangle) =
        spriteBatch.Draw(texture, this.GetBounds(trackBounds), Color.Green)
Let’s break that down. Each obstacle has an x position, and a width and height. It is Visible if its right-hand side is not off the left-edge of the screen. GetBounds is a public method because, in addition to using it to draw the obstacle, we’ll also need it later for collision detection.
Update is where the magic happens: we move the obstacle to the left (because speed is negative; otherwise it would move to the right) by an amount proportional to deltaTime, which is the time that has elapsed since the last frame.
Draw uses MonoGame’s SpriteBatch to draw the “texture”. The texture is actually just a 1x1 white pixel, which we can colour anything we like by passing a Color as the final parameter to SpriteBatch.Draw.
Now we need a way to generate new obstacles. We’ll apply some randomness to the width, height, and position of new obstacles, to keep the player on their toes. Here’s the code:
[<CompilationRepresentation(CompilationRepresentationFlags.ModuleSuffix)>]
module Obstacle =
    let rng = System.Random()

    let addNewObstacles (trackBounds : Rectangle) (obstacles : Obstacle list) =
        let isMostRecentlyAddedObstacleFullyVisible =
            match obstacles with
            | head :: tail -> head.GetBounds(trackBounds).Right < trackBounds.Right
            | [] -> true

        if isMostRecentlyAddedObstacleFullyVisible then
            let x = trackBounds.Right + 200 + rng.Next(200)
            let width = rng.Next(minObstacleWidth, maxObstacleWidth)
            let height = rng.Next(minObstacleHeight, maxObstacleHeight)
            let newObstacle = Obstacle(single(x), width, height)
            newObstacle :: obstacles
        else
            obstacles

    // ...
I’m using the CompilationRepresentation attribute to have a module with the same name as a type, which would usually be a compile error. It’s a trick I found in the F# runtime library source code, to “attach” functional-style functions to a type.
In addNewObstacles, we check whether the obstacle that we added most recently is now fully visible on the screen. It it isn’t, it means it’s still either fully off the screen to the right, or it’s only partially visible. If it is fully visible, it’s time to add a new obstacle.
We add a new obstacle as follows:
- Calculate its
xposition as being 200 pixels off the right of the screen, plus a random value between 0 and 200. This random value is what creates the random spacing between obstacles. - Calculate the
widthas another random value - in my version, I’ve set the min/max as 20/35 respectively. - Same with the height - I’ve used min/max heights of 15/40, but I haven’t spent a lot of time playtesting it. You can decrease the maximum height to make it easier. Remember that if you set the maximum width or height too high, it will be impossible to play!
The return value of addNewObstacles is the new obstacle, added to the front of the list of existing obstacles. (Or the original list, if we didn’t need to add a new obstacle.)
After Santa has jumped over each obstacle, the obstacles will disappear off the left edge of the screen. We could just leave them lying around, since they won’t be rendered. And it’s unlikely that anybody will be able to play the game for long enough for memory usage to become a problem! But still, we’ll be good citizens by cleaning up after ourselves. Add the following at the end of the Obstacle module, after addNewObstacles:
module Obstacle =
    // ...

    let removeOldObstacles (obstacles : Obstacle list) =
        obstacles |> List.filter (fun o -> o.Visible)
We’ve written a lot of code, without being able to run it and see something on the screen. We’ll fix that soon; but we’ve got some more work to do first. For now, we’ll just draw one “track” on the screen, but later, we’ll want to make the game more interesting (a.k.a. harder) by drawing multiple tracks. So we’ll do some of that work upfront by making a Track to manage our obstacles. Add the following code below the Obstacle module:
type Track(color, bounds : Rectangle) =
    let mutable obstacles = List.empty<Obstacle>

    member this.Update(deltaTime) =
        for obstacle in obstacles do
            obstacle.Update(deltaTime)

        obstacles <- obstacles
            |> Obstacle.removeOldObstacles
            |> Obstacle.addNewObstacles bounds

    member this.Draw(spriteBatch : SpriteBatch, texture) =
        spriteBatch.Draw(texture, bounds, color) // Track background
        for obstacle in obstacles do
            obstacle.Draw(spriteBatch, texture, bounds)
We pass a color in to the constructor, because later we’ll want each track to have its own background colour. (At this point, I’d like to take the opportunity apologise for switching between English (traditional) and English (simplified) spellings; I tend to use the American spelling for code, and the English spelling in prose.) We also pass in the bounds - for now, this will be the whole window, but later each track will only take up part of the window.
In Update, we first update each obstacle. Then old obstacles are removed, and new obstacles added, using the functions we wrote earlier.
Draw first draws the track background, again making use of our 1x1 pixel texture, and then draws each obstacle.
Let’s hook all this up, by making some changes to our MakeSantaJumpGame type. Add the following code after the do graphics.* calls and before LoadContent:
    let mutable spriteBatch = Unchecked.defaultof<SpriteBatch>
    let mutable texture = Unchecked.defaultof<Texture2D>

    let mutable tracks = []
Unchecked.defaultof is generally considered bad practice in F# code, but I think it’s okay/necessary in this instance; we need to make these values available to multiple methods in our game type.
Change LoadContent to this:
    override this.LoadContent() =
        spriteBatch <- new SpriteBatch(this.GraphicsDevice)

        texture <- new Texture2D(this.GraphicsDevice, 1, 1)
        texture.SetData([| Color.White |])

        tracks <- [ Track(Color.Red, this.GraphicsDevice.Viewport.Bounds) ]
Change Update to this:
    override this.Update(gameTime) =
        let deltaTime = single(gameTime.ElapsedGameTime.TotalMilliseconds)
        for track in tracks do
            track.Update(deltaTime)
Finally, change Draw to this:
    override this.Draw(gameTime) =
        this.GraphicsDevice.Clear Color.Black

        spriteBatch.Begin(SpriteSortMode.Deferred, BlendState.NonPremultiplied)

        for track in tracks do
            track.Draw(spriteBatch, texture)

        spriteBatch.End()
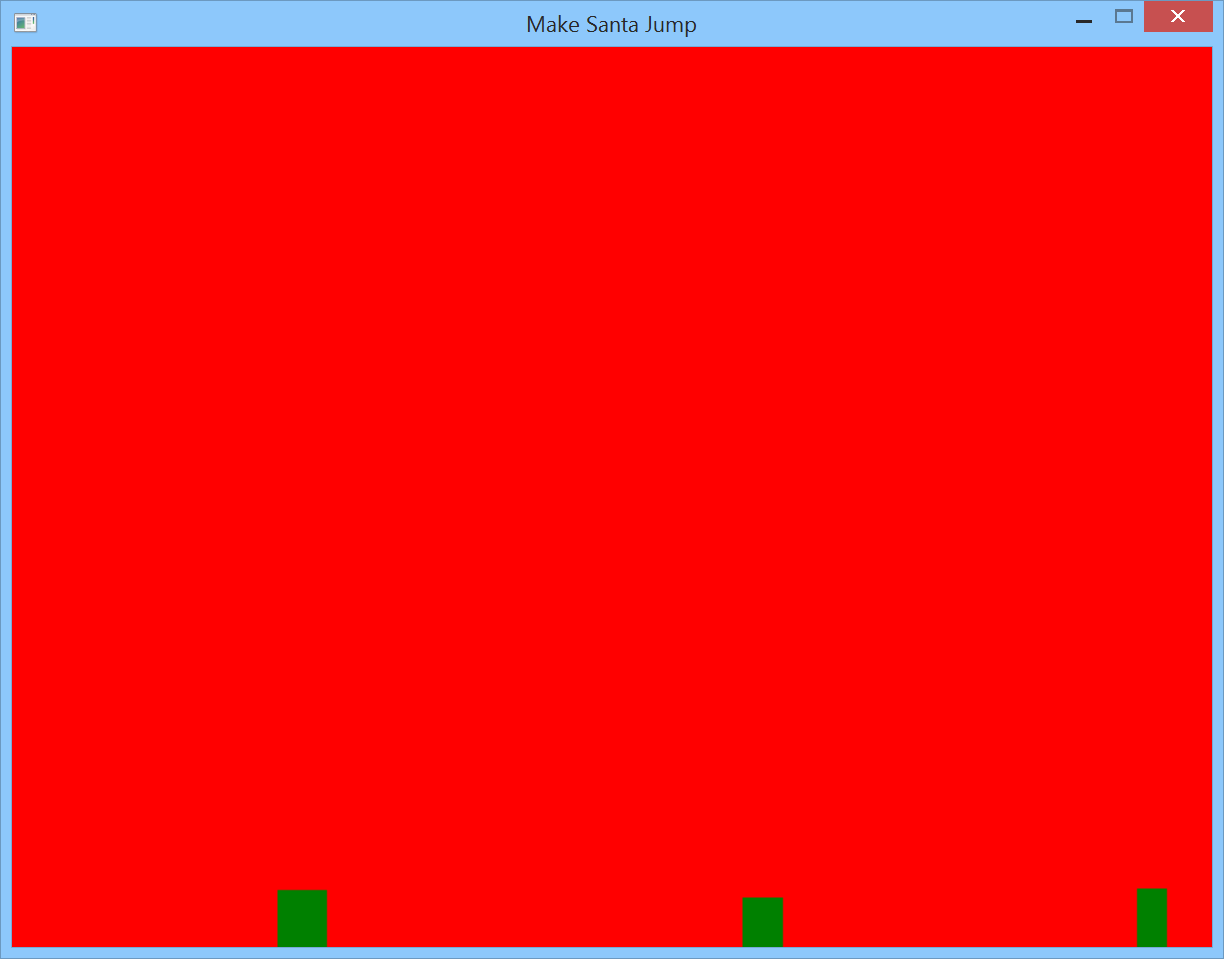
Now run the game, and marvel at the glorious green boxes making their way left-ward! Okay, it’s not much, but we’re on our way.
Santa
Now that we’re animating and drawing some obstacles, we need a Santa to jump over them. We’ll start by drawing a white box representing Santa, then we’ll load an actual texture, and finally we’ll animate Santa.
We’ll start with a Santa type. Add this above the Obstacle type, near the top of Game.fs:
type Santa(startBottom) =
    let santaX = 50
    let santaWidth = 30
    let santaHeight = 30

    let mutable y = single(startBottom - santaHeight)

    member this.Bounds
        with get() = Rectangle(santaX, int(y), santaWidth, santaHeight)

    member this.Draw(spriteBatch : SpriteBatch, texture) =
        spriteBatch.Draw(texture, this.Bounds, Color.White)
We need to update our Track type to create and draw Santa. Add this after the existing obstacles binding:
type Track(color, bounds) =
    // ...
    let santa = Santa(bounds.Bottom)
Then replace Track.Draw with this:
type Track(color, bounds) =
    // ...
    member this.Draw(spriteBatch : SpriteBatch, texture) =
        spriteBatch.Draw(texture, bounds, color) // Track background
        for obstacle in obstacles do
            obstacle.Draw(spriteBatch, texture, bounds)
        santa.Draw(spriteBatch, texture)
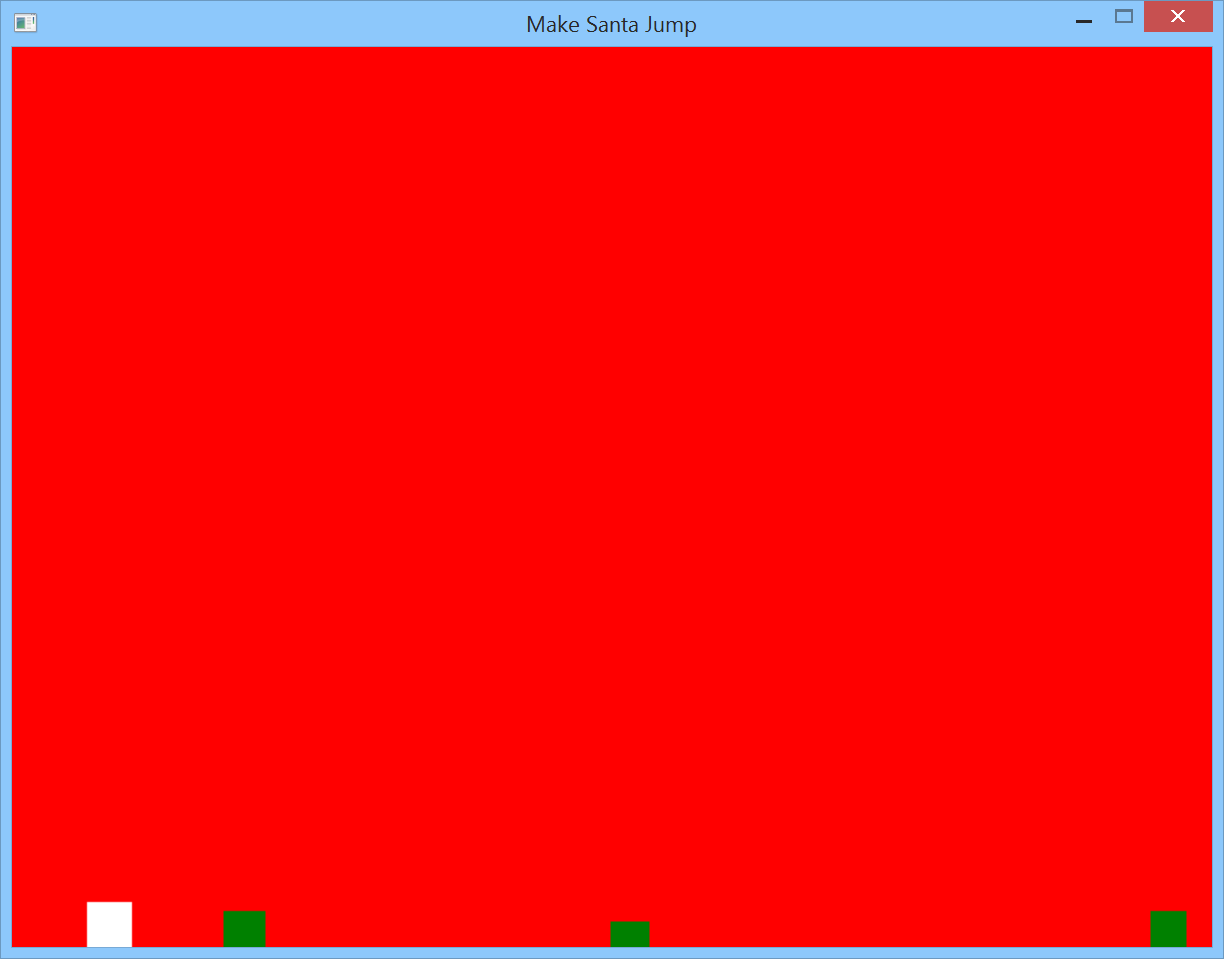
This is another chance to run the game! Hit F5 and you should see a white box in the bottom left. Don’t worry, we’ll make Santa look a little more interesting in the next section.
Santa sprite
I can’t draw at all, but after searching for a while, I found a suitable Santa sprite with a permissive licence here on OpenGameArt. (Thank you Casey!) Here’s the original image:
![]()
The original image has 2 frames at the beginning with Santa standing still, and 1 frame at the end with him jumping, which interrupt the running animation. I cracked open my trusty paint.net, figured out that each sprite in the animation is 64 pixels wide, and then removed the first 2 and last sprites, ending up with this:
![]()
I also made the background transparent, and saved it as a non-indexed PNG (because MonoGame complained when I tried to load an indexed PNG).
We’re going to treat that texture as 8 frames of an animation, and cycle through each frame in turn.
I chose not to use MonoGame’s content pipeline. The MonoGame content pipeline tool hasn’t been officially released yet, and I’d prefer not to send you off to download nightly builds. The content pipeline tool is going to be great; it’s just not ready yet. So we’ll load our textures directly, which fortunately is supported just fine by MonoGame.
The first thing to do is download the Santa sprite texture. Then right-click the project in Solution Explorer, choose “Add” > “Existing Item…”, and find the Santa.png file you just downloaded. This will copy it into your project folder and add it to the project.
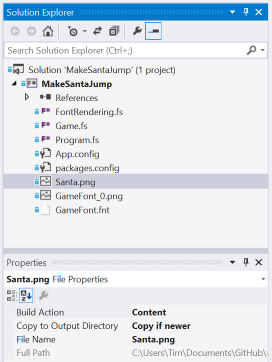
Select Santa.png in Solution Explorer, and in the Properties window, change “Build Action” to “Content” and “Copy to Output Directory” to “Copy if newer”:
Now we’ll add the code to load and draw the Santa texture. At the top of Game.fs, below the let statements controlling game difficulty, add this code:
type SpriteTexture =
    {
        texture : Texture2D;
        textureData : Color array;
        spriteWidth : int;
        numSprites : int;
    }
Then change the Santa declaration and first few lines to this:
type Santa(spriteTexture : SpriteTexture, startBottom) =
    let santaX = 50
    let santaWidth = spriteTexture.spriteWidth
    let santaHeight = spriteTexture.texture.Height

    let mutable y = single(startBottom - santaHeight)
    let mutable spriteIndex = 0
We’ll use spriteIndex later to control cycling through each frame of the animation.
Replace Santa.Draw with this code:
type Santa(spriteTexture : SpriteTexture, startBottom) =
    // ...
    member this.Draw(spriteBatch : SpriteBatch) =
        let spriteBounds =
            Rectangle(spriteIndex * spriteTexture.spriteWidth, 0,
                      spriteTexture.spriteWidth,
                      spriteTexture.texture.Height)
        spriteBatch.Draw(spriteTexture.texture, this.Bounds,
                         System.Nullable(spriteBounds),
                         Color.White)
We need to pass the spriteTexture into the Track constructor, and use it when creating Santa:
type Track(color, bounds : Rectangle, spriteTexture) =
    let mutable obstacles = List.empty<Obstacle>
    let santa = Santa(spriteTexture, bounds.Bottom)
In Track.Draw, change the santa.Draw line to this:
santa.Draw(spriteBatch)
In MakeSantaGame, add this code below let mutable texture = ...:
let mutable spriteTexture = Unchecked.defaultof<SpriteTexture>
We’re almost done with this part! Replace the last line of LoadContent with this code:
        use santaStream = System.IO.File.OpenRead("Santa.png")
        let santaTexture = Texture2D.FromStream(this.GraphicsDevice, santaStream)
        let santaTextureData = Array.create<Color> (santaTexture.Width * santaTexture.Height) Color.Transparent
        santaTexture.GetData(santaTextureData)
        spriteTexture <- { texture = santaTexture;
                           textureData = santaTextureData;
                           spriteWidth = santaTexture.Width / 8;
                           numSprites = 8 }

        tracks <- [ Track(Color.Red, this.GraphicsDevice.Viewport.Bounds, spriteTexture) ]
Since we’re not using the content pipeline, we load the texture ourselves using Texture2D.FromStream. The next couple of lines copy the pixel data out of the texture into an array of Colors - we don’t need this now, but we’ll need it soon when we do pixel-perfect collision detection. Then, we set the number of sprites in the texture - this is hardcoded, which is fine for us, but in a bigger game you’d probably want to load this dynamically from some kind of sidecar file.
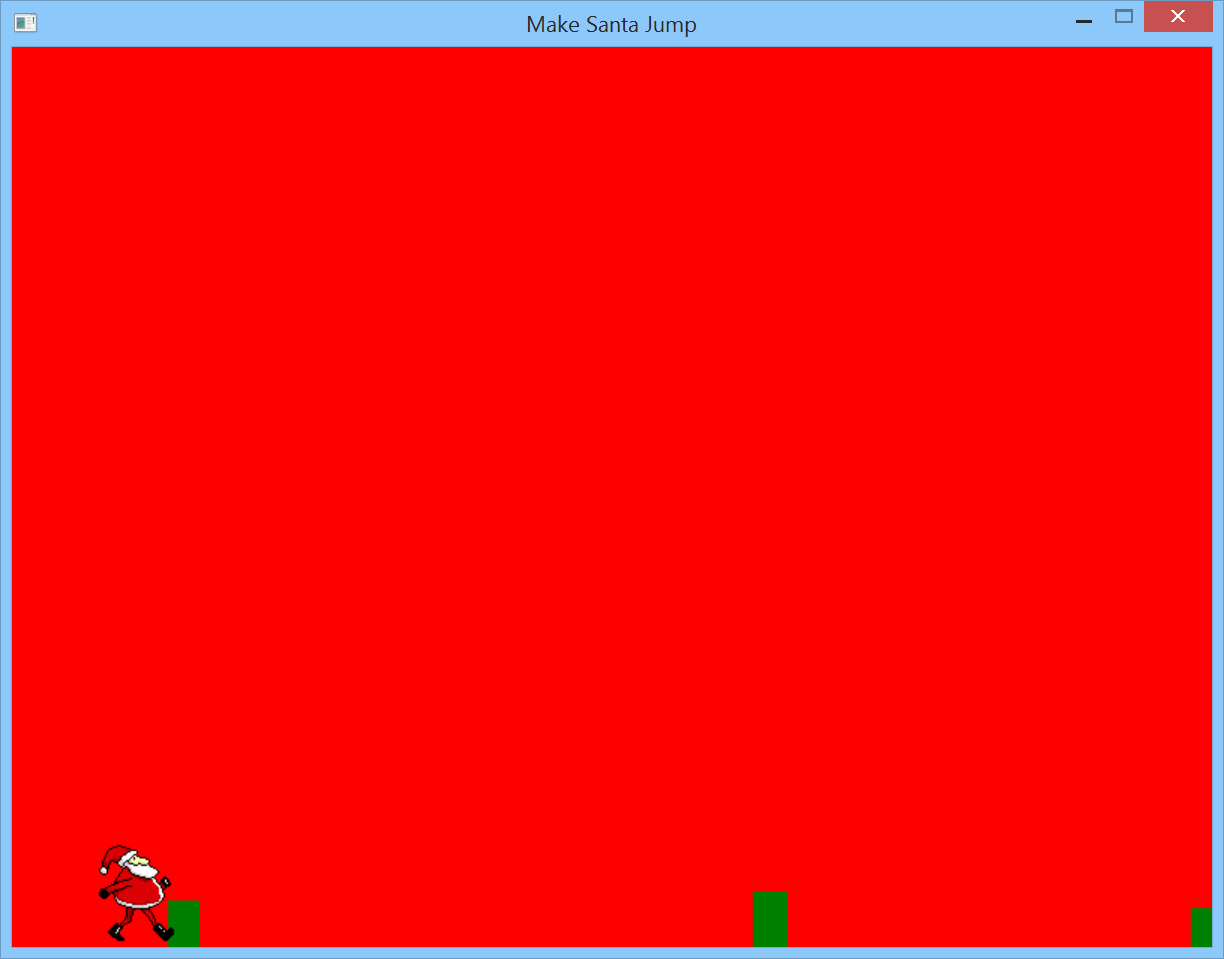
Run the game, and if everything went right, you should see something like this:
![]()
That was a lot of fairly boring but necessary code. The next section - animating Santa - should be more fun!
Animated Santa
At the moment, we’re loading a texture that contains 8 frames of a Santa animation, but we’re only showing the first frame. We’re going to work on that now. We’ll show each frame of the animation for 80 milliseconds (that’s an arbitrary figure; feel free to adjust it if you think it makes the animation look better).
We’ll do the animation by keeping track of the time since we last cycled to the next animation frame. When that timer reaches 80ms, we’ll move to the next frame and reset the timer to zero.
Let’s write some code. First, add this code, just above the existing spriteIndex binding, to keep track of the timer value:
type Santa(spriteTexture : SpriteTexture, startBottom) =
    // ...
    let mutable spriteTimer = 0.0f
Now add a new Santa.Update method, just above the existing Draw method:
type Santa(spriteTexture : SpriteTexture, startBottom) =
    // ...
    member this.Update(deltaTime, trackBounds : Rectangle) =
        // Update sprite.
        let spriteChangeTime = 80.0f
        spriteTimer <- spriteTimer + deltaTime
        if spriteTimer >= spriteChangeTime then
            spriteTimer <- 0.0f
            let wrap value max =
                if value > max then 0 else value
            spriteIndex <- wrap (spriteIndex + 1) (spriteTexture.numSprites - 1)
Hopefully that makes sense. Each time Update is called, spriteTimer is incremented with the time that has elapsed since the last frame. If enough time has passed that it’s now time to move to the next sprite, we reset the timer to zero and update spriteIndex (taking care to wrap it back to 0 if appropriate).
Then we just need to call Santa.Update. Add this code at the very start of Track.Update:
member this.Update(deltaTime) =
    santa.Update(deltaTime, bounds)
    // ...
Run the game now, and you should see Santa marching merrily. And marching straight through the obstacles, but don’t worry about that for now… Next, we’ll implement some keyboard input to, as the name of the game suggests, make Santa jump!
Make Santa actually jump
When you run the game right now, it’s not very… interactive. We’ve got an animated Santa, and we’ve got obstacles that move along the screen, but we can’t yet control Santa, as it were. Let’s fix that now, by setting up some keyboard input and implementing some physics. (I use “physics” in the loosest possible sense of the word.)
We won’t hardcode the trigger key inside the Santa type, because later we’ll be drawing multiple tracks, each with their own Santa, and each Santa will need a different trigger key. So we need to update the Santa constructor to pass in the trigger key:
type Santa(spriteTexture : SpriteTexture, trigger, startBottom) =
    // ...
Once Santa has started jumping, we need to keep track of his vertical speed, as well as whether he is jumping at all. Add these two lines of code just above the existing spriteTimer binding:
    let mutable dy = 0.0f
    let mutable isJumping = false
Let’s assume that we have a function, isKeyPressedSinceLastFrame, which tells us whether any given key has been pressed since the last frame. (We’ll actually write that function shortly.) We’ll pass that function in to Santa.Update.
    member this.Update(deltaTime, isKeyPressedSinceLastFrame : Keys -> bool, trackBounds : Rectangle) =
        // ...
Next, we’ll see if the trigger key (i.e. Space) was pressed between the last frame and this one. Add this code at the top of Santa.Update (don’t delete the existing code to update the sprite index):
    member this.Update(deltaTime, isKeyPressedSinceLastFrame : Keys -> bool, trackBounds : Rectangle) =
        // Should we start a jump?
        if not isJumping && isKeyPressedSinceLastFrame(trigger) then
            isJumping <- true
            dy <- -0.45f

        // ...
Without not isJumping, it would be possible for Santa to chain jumps, which would make the game trivially easy - nobody wants that. So if Santa is not already jumping, and the player has hit the trigger key, we start him jumping. We do that by setting isJumping to true, and setting dy. dy represents Santa’s vertical speed. You might wonder why dy is set to a negative value. Well, when drawing sprites in MonoGame, the Y axis points downwards. So to make Santa jump upwards, we need to set his vertical speed to a negative value. (In a more complex game, I’d try to use real-world units in my game code, and then convert as necessary when rendering.)
Each time Santa.Update is called, we’ll update Santa’s position using a little bit of physics. You might remember from school that velocity is the rate of change of position over time ($v(t)=\frac{dx}{dt}$). If we assume Santa’s velocity is constant over the whole frame (and let’s face it, this is not a game in which we need to worry too much about non-constant velocity), then we can calculate the change in position for a whole frame using $dx = v*dt$. And since Santa can only move in the vertical direction, our job is even simpler.
As soon as Santa starts jumping, we need to apply some gravity to drag him back down (presumably this is not normally an issue for Santa Claus). This gravity will cause his upward speed to slow, pass through zero, and become downward speed, and eventually result in him falling back to “earth” (or at least, the track from which he jumped). When we detect that he has landed, we fix his position to be resting on the track (to make sure he doesn’t fall below the track).
Here’s how we implement our game’s “physics”. Add this code to Santa.Update, below the code we just added to start a jump, and above the existing sprite update code. If this is getting a bit confusing, feel free to have a look at the final source code on GitHub.
        if isJumping then
            // Physics!
            y <- y + dy * deltaTime

            let hasLanded = int(y) + santaHeight >= trackBounds.Bottom
            if hasLanded then
                y <- single(trackBounds.Bottom - santaHeight)
                isJumping <- false
                dy <- 0.0f
            else
                dy <- dy + gravity
        else
            // Existing sprite update code here.
Now we need to update Track. First, add triggerKey to the type declaration, and pass it to the Santa constructor:
type Track(color, bounds : Rectangle, spriteTexture, triggerKey) =
    // ...
    let santa = Santa(spriteTexture, triggerKey, bounds.Bottom)
Then change the definition and first line of Track.Update to this:
    member this.Update(deltaTime, isKeyPressedSinceLastFrame) =
        santa.Update(deltaTime, isKeyPressedSinceLastFrame, bounds)
In MakeSantaJumpGame.LoadContent, change the last line of code (that creates the track) to this:
tracks <- [ Track(Color.Red, this.GraphicsDevice.Viewport.Bounds, spriteTexture, Keys.Space) ]
MonoGame gives us a nice way to interact with the keyboard. We can ask the keyboard for its current state, and we’ll get back an object that we can query. Let’s say we use the Space key to make Santa jump. But we don’t only want to know whether the Space key is down now - we want to know whether it has been pressed since the last frame. That’s to prevent players sitting with their fingers permanently on the Space key - which, admittedly, wouldn’t work too well as a strategy, but we’ll prevent it anyway.
Replace MakeSantaJumpGame.Update with this code:
    override this.Update(gameTime) =
        let currentKeyState = Keyboard.GetState()
        let deltaTime = single(gameTime.ElapsedGameTime.TotalMilliseconds)

        let isKeyPressedSinceLastFrame key =
            currentKeyState.IsKeyDown(key) && lastKeyState.IsKeyUp(key)

        for track in tracks do
            track.Update(deltaTime, isKeyPressedSinceLastFrame)

        lastKeyState <- currentKeyState
The main change is adding isKeyPressedSinceLastFrame, which returns true if the specified key is pressed now, and wasn’t pressed last time we checked.
Finally, add this line below the tracks binding just above LoadContent:
let mutable lastKeyState = KeyboardState()
Now is another good time to run the game. Hit the Space key, and watch in amazement as Santa arcs gracefully over the barren landscape.
It’s starting to feel like a game! We have three things left to do:
- Detecting and handling collisions between Santa and the obstacles
- Drawing multiple tracks on the screen, each with their own trigger key and background colour
- Game state management - showing a menu, showing a “game over” screen, keeping score
Collisions
Right now, Santa can run and jump over obstacles, but if he hits an obstacle, nothing happens. We want to know when he hits an obstacle (also known as “collision detection”), so that we can end the game. Let’s work on that.
We’re going to implement two-phase collision detection:
-
Santa, and all of the obstacles, have a “bounding rectangle”. This is the rectangle that completely encloses them. For obstacles, it’s easy - the bounding rectangle is exactly the shape of the obstacle. For Santa, the bounding rectangle is the size of a single frame of the sprite texture. As a first pass, we’ll check if Santa’s bounding rectangle overlaps with any of the obstacles’ bounding rectangles.
-
If Santa’s bounding rectangle does overlap with an obstacle’s bounding rectangle, it doesn’t necessary mean he has collided with the obstacle. Have a look at the sprite texture we’re using for Santa - there’s a lot of empty space around the corners. It would be unfair to penalise the player just because an empty corner of the Santa sprite has collided with an obstacle. So if the bounding rectangles overlap, we will proceed to check every pixel of the current frame of Santa’s sprite texture. If we find any non-transparent pixels overlapping the obstacle, then we can be sure that there is a collision.
We’ll implement this with a new method, HasCollisions. Add this code to the Track type, after Draw:
type Track(color, bounds : Rectangle, spriteTexture, triggerKey) =
    // ...
    member this.HasCollisions() =
        let santaBounds = santa.Bounds

        let obstacleCollidingWithSanta (obstacle : Obstacle) =
            // First do simple intersection.
            let obstacleBounds = obstacle.GetBounds(bounds)

            if santaBounds.Intersects(obstacleBounds) then
                // If the bounding rectangles overlap, then do pixel-perfect collision detection.
                let x1 = max (obstacleBounds.X - santaBounds.X) 0
                let x2 = min (obstacleBounds.Right - santaBounds.X) santaBounds.Width

                let y1 = max (obstacleBounds.Y - santaBounds.Y) 0
                let y2 = min (obstacleBounds.Bottom - santaBounds.Y) santaBounds.Height

                santa.AnyNonTransparentPixels(x1, x2, y1, y2)
            else
                false

        List.exists obstacleCollidingWithSanta obstacles
The List.exists call on the last line means that we’ll call obstacleCollidingWithSanta for each obstacle in obstacles. We first check if the bounding rectangles overlap; if they do, we proceed to pixel-perfect collision detection. Because pixel-perfect collision detection can get expensive (i.e. it can take a long time), we limit it to just the pixels from Santa’s sprite texture that are overlapping with the obstacle.
Now add this code to the end of the Santa type, after Draw:
type Santa(spriteTexture : SpriteTexture, trigger, startBottom) =
    // ...
    member this.AnyNonTransparentPixels(x1, x2, y1, y2) =
        let xOffset = spriteTexture.spriteWidth * spriteIndex
        let pixelsInsideRegion = seq {
            for y in y1..y2-1 do
                for x in (x1 + xOffset)..(x2 + xOffset - 1) do
                    let index = (y * spriteTexture.texture.Width) + x
                    yield spriteTexture.textureData.[index]
        }
        Seq.exists (fun c -> c <> Color.Transparent) pixelsInsideRegion
As soon as we find a non-transparent pixel inside the search region, we want to exit the function. However, in F#, we can’t do an explicit return, or break like we can in C# (although there are clever ways to simulate this kind of control flow). So I’m using a sequence, which is basically an IEnumerable<T>. The pixelsInsideRegion sequence yields all of the pixels inside the search region. Calling Seq.exists with the pixelsInsideRegion function means that as soon as we find a non-transparent pixel, we’ll stop the search and return.
Now we can detect collisions, but we’re not yet calling this code. Soon, we’ll implement a proper “Game Over” screen, but for now, let’s just stop the game as soon as we detect a collision. Add this code to MakeSantaJumpGame, just below the lastKeyState binding:
type MakeSantaJumpGame() as this =
    // ...
    let mutable gameOver = false
Then in MakeSantaJumpGame.Update, replace the loop which updates each track with this code:
    override this.Update(gameTime) =
        // ...
        if not gameOver then
            for track in tracks do
                track.Update(deltaTime, isKeyPressedSinceLastFrame)
            if List.exists (fun (t : Track) -> t.HasCollisions()) tracks then
                gameOver <- true
        // ...
Now run the game again. When Santa hits an obstacle, the game should come to an abrupt halt. That’s collision detection done!
Multiple tracks
Next, we’ll ramp up the difficulty level by having Santa run along multiple “tracks” at the same time. Each track will have its own trigger key, and the player needs to make Santa jump at the appropriate time on each track.
Fortunately, we’ve done most of the work already. We have a Track type, which abstracts everything related to an individual track. All we need to do is split the game window up into sections, and put a track in each section. To make it look nicer, we’ll leave some “padding” space between each track, and each track will have its own background colour.
This is all implemented in the following code. Add it below the Track type, and above the MakeSantaJumpGame type:
[<CompilationRepresentation(CompilationRepresentationFlags.ModuleSuffix)>]
module Track =
    let createTracks (gameBounds : Rectangle) spriteTexture numTracks =
        let padding = 10
        let totalPadding = (numTracks - 1) * padding
        let availableHeight = gameBounds.Height - totalPadding
        let trackHeight = availableHeight / numTracks

        let colors = [ Color.Red; Color.Blue; Color.Purple; Color.Brown; Color.Gold ]
        let keys = [ Keys.A; Keys.S; Keys.D; Keys.F; Keys.Space ]

        let makeTrack i =
            let trackBounds = Rectangle(0, i * (trackHeight + padding),
                                        gameBounds.Width, trackHeight)
            Track(colors.[i], trackBounds, spriteTexture,
                  keys.[i + (keys.Length - numTracks)])

        List.init numTracks makeTrack
We do some calculation to create padding space between each track, and then calculate how high each track should be.
The colors and keys lists are hardcoded to 5 items, so this code will crash if we ever call it with numTracks > 5.
Now change the last line in MakeSantaJump.LoadContent, which populates the tracks list, to this:
    override this.LoadContent() =
        // ...
        tracks <- Track.createTracks this.GraphicsDevice.Viewport.Bounds spriteTexture 3
The last parameter to Track.createTracks is the number of tracks - try adjusting this anywhere between 1 and 5 to see the result. (Yes, 5 tracks is insanely difficult…)
With 3 tracks, the trigger keys are “D”, “F”, and “Space”, respectively. I’ve tried to make it comfortable to hit these keys when your hands are in the “home” position on the keyboard. I’m probably exhibiting a bit of left-handed bias - of course, you can change the trigger keys to whatever you prefer!
If you run the game now, hopefully you’ll agree that it’s starting to become quite playable! Have a try - and if you want to try adjusting the difficulty level by tweaking the parameters at the top of Game.fs, now is a good time.
Drawing text
Before we go further, it would helpful if we had some way to draw text to the screen. It would be nice to tell the player what the trigger key is for each track. And later on, we’ll also want to show the player their score, and make a menu screen, and a game over screen - all of which will require text.
The normal way to draw text in MonoGame is to:
- Create a SpriteFont file, which is an XML description of the font you want to use
- Build the SpriteFont file using the content pipeline
- Load it into your game, and call
SpriteBatch.DrawString.
Because we’re not using the content pipeline for this game, this won’t work for us. Instead, we’ll go old-school and do the hard work ourselves. Or more specifically, we’ll use the hard work that somebody else has already done. BMFont is a handy bitmap font generator tool, and I found this article about using BMFont with MonoGame. You can either follow that article, or (recommended) download the files I already created using BMFont.
You’ll need these two files:
As you did with Santa.png, download these 2 files and add them to your project as existing items (right-click the project in Solution Explorer, “Add” > “Existing Item…”). Change the “Build Action” for both files to “Content”, and “Copy to Output Directory” to “Copy if newer”.
You’ll also need some boilerplate code to load the font file and use it draw text. Download FontRendering.fs, and add it to your project above Game.fs. (Right-click Game.fs in Solution Explorer, click “Add Above” > “Existing Item”, and find the FontRendering.fs you just downloaded.)
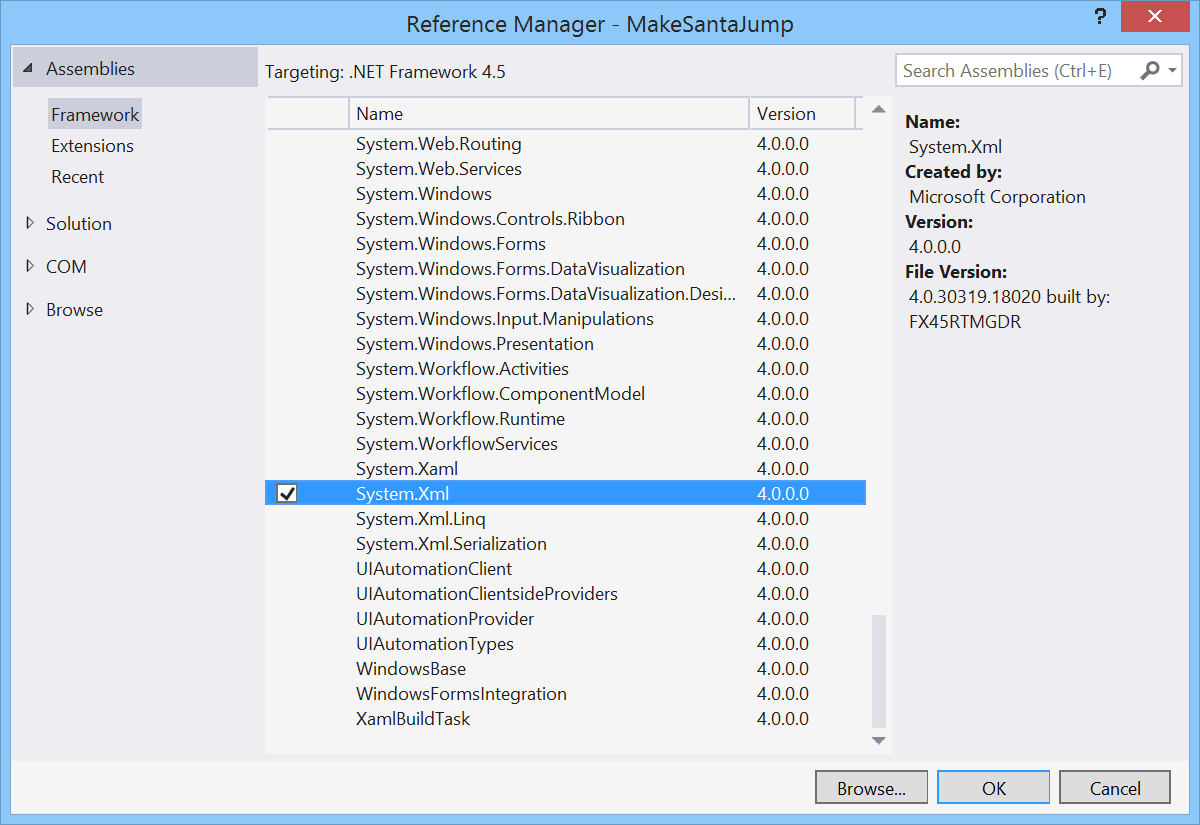
FontRendering.fs makes use of some XML types, so you’ll need to add a reference to System.XML. In Solution Explorer, right-click the References node, and “Add Reference…”. In the Assemblies > Framework tab, find the System.XML assembly, check the box next to it, and click OK.
Now add this code to MakeSantaJumpGame.LoadContent, just before the last line that creates the tracks:
    override this.LoadContent() =
        // ...
        use fontTextureStream = System.IO.File.OpenRead("GameFont_0.png")
        let fontTexture = Texture2D.FromStream(this.GraphicsDevice, fontTextureStream)
        let fontFile = FontRendering.FontLoader.Load("GameFont.fnt")
        fontRenderer <- FontRendering.FontRenderer(fontFile, fontTexture)
Then, add this line just below the existing spriteTexture binding:
type MakeSantaJumpGame() as this =
    // ...
    let mutable fontRenderer = Unchecked.defaultof<FontRendering.FontRenderer>
Just to prove it works, add this line to MakeSantaJumpGame.Draw, just before the last line (spriteBatch.End()):
    override this.Draw(gameTime) =
        // ...
        fontRenderer.DrawText(spriteBatch, 50, 50, "HO HO HO")
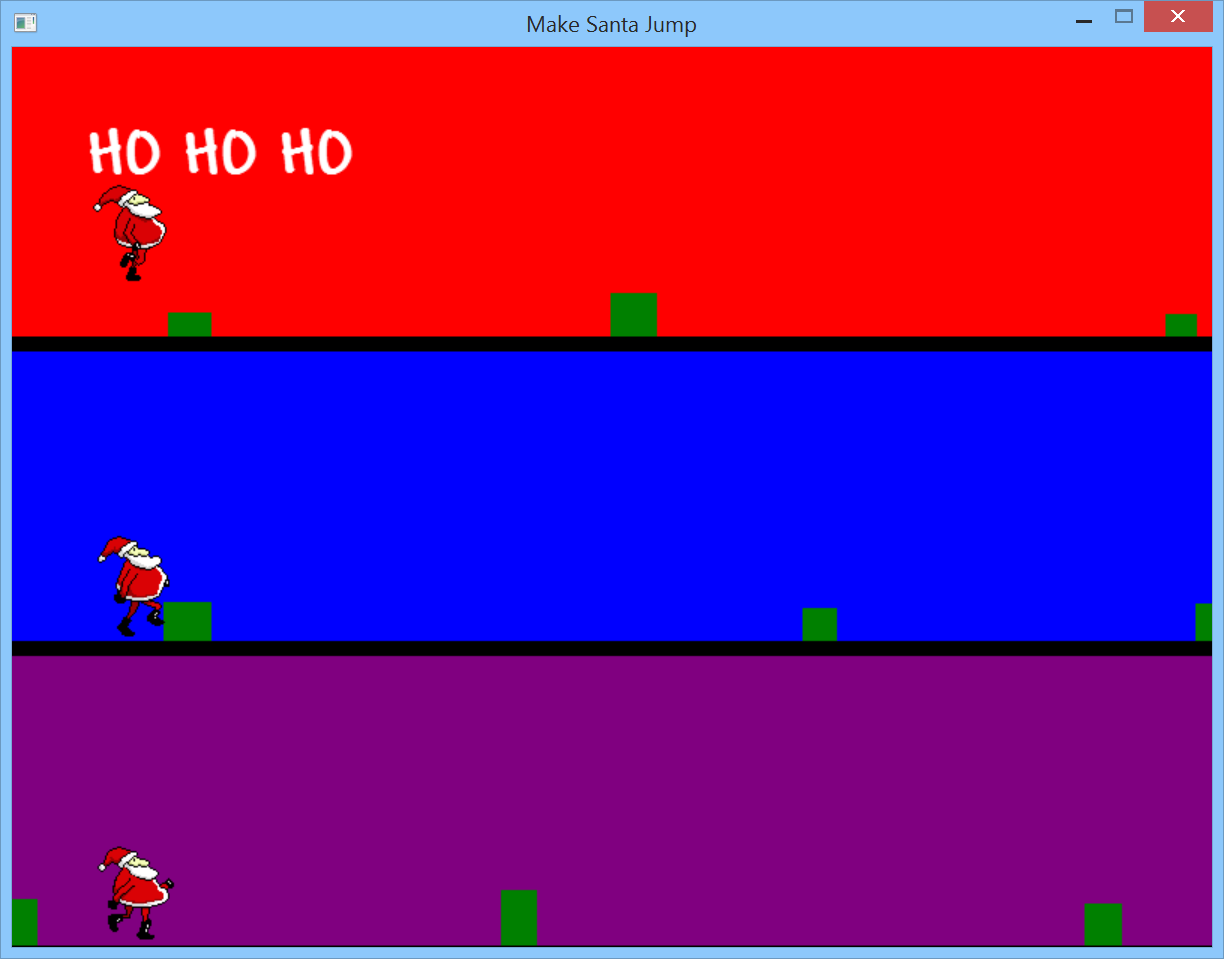
Once you’ve run the game and checked it works, remove this line - we don’t want it in our final game :)
Game state management
We’re nearly there! We’ve got the majority of the game in place. Santa can jump over obstacles, we can detect when he hits an obstacle and we can stop the game. But it’s not very player-friendly; we should
- give the player a way to choose the difficulty level
- show the player her score
- allow the player to start a new game without having to restart the whole program
First, add this enumeration type just above the MakeSantaJumpGame type:
type GameState =
    | MainMenu
    | Game
    | GamePaused
    | GameOver
Then add this line just above the tracks binding:
type MakeSantaJumpGame() as this =
    // ...
    let mutable gameState = MainMenu
Remove the gameOver binding - we don’t need it anymore.
Also remove the last line of LoadContent (the line which populates tracks) - we’re going to do that in a different way now.
Replace MakeSantaJumpGame.Update with this:
type MakeSantaJumpGame() as this =
    // ...
    override this.Update(gameTime) =
        let currentKeyState = Keyboard.GetState()
        let deltaTime = single(gameTime.ElapsedGameTime.TotalMilliseconds)

        let isKeyPressedSinceLastFrame key =
            currentKeyState.IsKeyDown(key) && lastKeyState.IsKeyUp(key)

        match gameState with
        | MainMenu ->
            let startGame numTracks =
                tracks <- Track.createTracks this.GraphicsDevice.Viewport.Bounds spriteTexture numTracks
                gameState <- Game

            if isKeyPressedSinceLastFrame Keys.D1 then startGame 1
            elif isKeyPressedSinceLastFrame Keys.D2 then startGame 2
            elif isKeyPressedSinceLastFrame Keys.D3 then startGame 3
            elif isKeyPressedSinceLastFrame Keys.D4 then startGame 4
            elif isKeyPressedSinceLastFrame Keys.D5 then startGame 5
        | Game ->
            if isKeyPressedSinceLastFrame Keys.P then
                gameState <- GamePaused
            else
                for track in tracks do
                    track.Update(deltaTime, isKeyPressedSinceLastFrame)
                if List.exists (fun (t : Track) -> t.HasCollisions()) tracks then
                    gameState <- GameOver
        | GamePaused ->
            if isKeyPressedSinceLastFrame Keys.P then
                gameState <- Game
        | GameOver ->
            if isKeyPressedSinceLastFrame Keys.Space then
                gameState <- MainMenu

        lastKeyState <- currentKeyState
D1, D2, etc. are the number keys. So when we’re in the MainMenu state, and the player presses a number key between 1 and 5, we’ll start the game using the specified number of tracks.
If we’re in the Game state, we’ll do what we were doing before, with the addition of allowing the player to pause the game with the P key.
If we’re in the GamePaused state, pressing the P key will unpause the game.
Finally, in the GameOver state, pressing Space will return the player to the main menu.
We also need to update the Draw method. Replace MakeSantaJumpGame.Draw with this code:
type MakeSantaJumpGame() as this =
// ...
override this.Draw(gameTime) =
this.GraphicsDevice.Clear Color.Black
spriteBatch.Begin(SpriteSortMode.Deferred, BlendState.NonPremultiplied)
match gameState with
| MainMenu ->
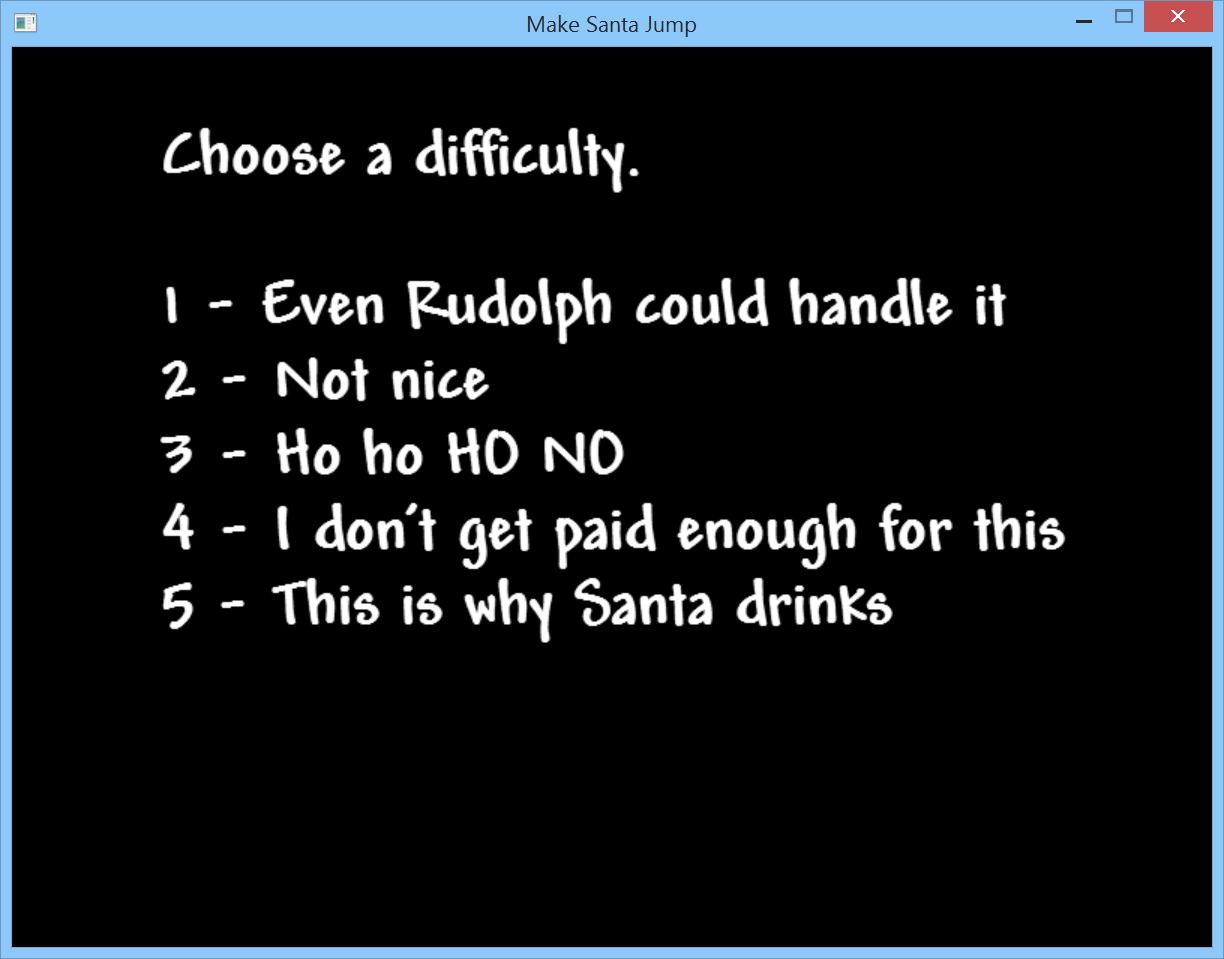
fontRenderer.DrawText(spriteBatch, 100, 50, "Choose a difficulty.")
fontRenderer.DrawText(spriteBatch, 100, 150, "1 - Even Rudolph could handle it")
fontRenderer.DrawText(spriteBatch, 100, 200, "2 - Not nice")
fontRenderer.DrawText(spriteBatch, 100, 250, "3 - Ho ho HO NO")
fontRenderer.DrawText(spriteBatch, 100, 300, "4 - I don't get paid enough for this")
fontRenderer.DrawText(spriteBatch, 100, 350, "5 - This is why Santa drinks")
| Game
| GamePaused ->
for track in tracks do
track.Draw(spriteBatch, texture, fontRenderer)
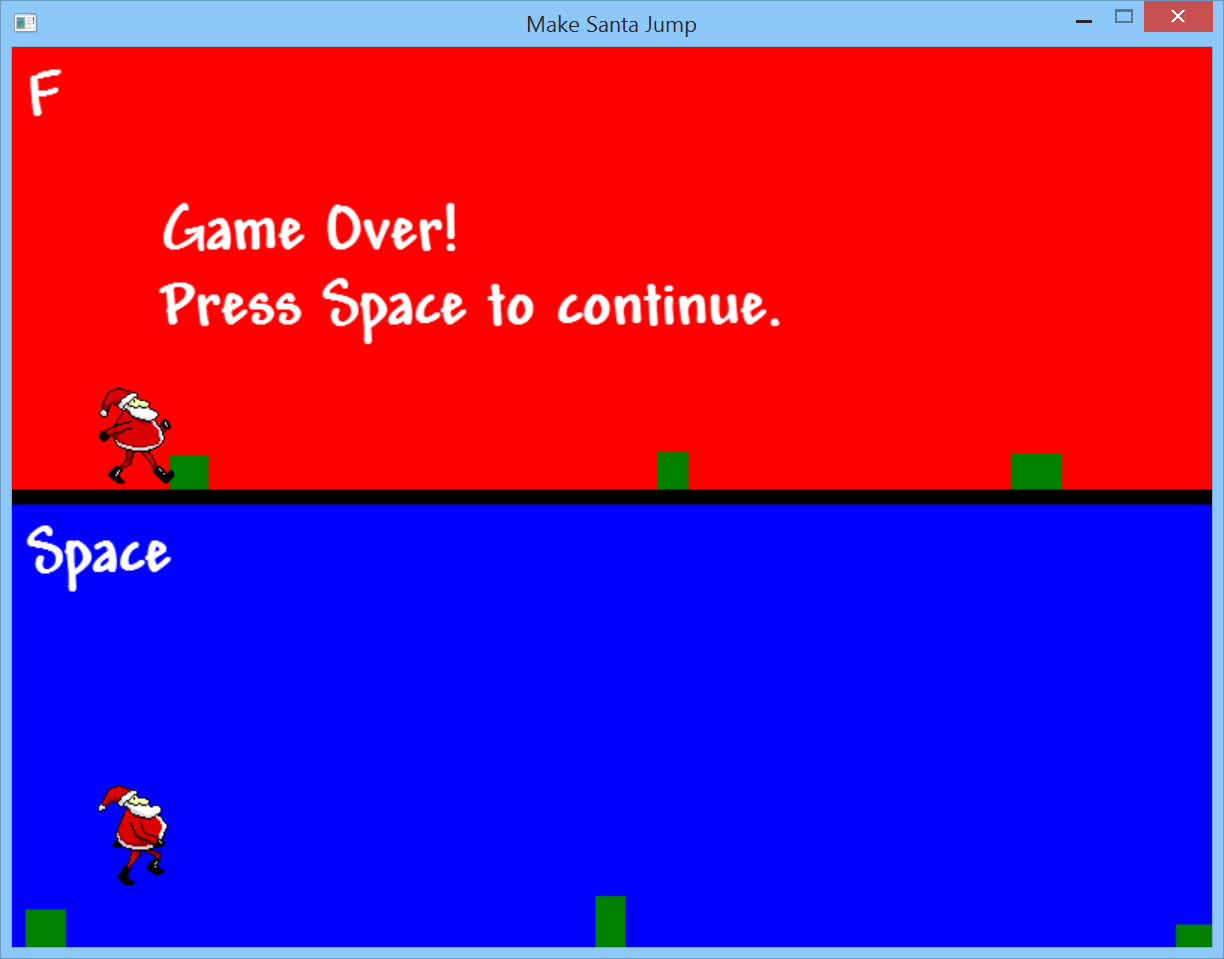
| GameOver ->
for track in tracks do
track.Draw(spriteBatch, texture, fontRenderer)
fontRenderer.DrawText(spriteBatch, 100, 100, "Game Over!")
fontRenderer.DrawText(spriteBatch, 100, 150, "Press Space to continue.")
spriteBatch.End()
We want to show the player the trigger key for each track. So update Track.Draw to have this signature:
type Track(color, bounds : Rectangle, spriteTexture, triggerKey) =
    // ...
    member this.Draw(spriteBatch : SpriteBatch, texture, fontRenderer : FontRendering.FontRenderer) =
And then add this as the last line in Track.Draw:
    member this.Draw(spriteBatch : SpriteBatch, texture, fontRenderer : FontRendering.FontRenderer) =
        // ...
        fontRenderer.DrawText(spriteBatch, 10, 10 + bounds.Y, triggerKey.ToString())
Run the game now, and be impressed with yourself for getting this far! We almost have a fully working, albeit very simple, game.
One final touch - let’s the show the player the current score. It’s not really a game if you can’t compete with yourself and / or your friends!
Add this line at the top of the Track type, above the existing santa binding:
type Track(color, bounds : Rectangle, spriteTexture, triggerKey) =
    // ...
    let mutable avoidedObstacles = 0
Then add this code just below the santa binding:
type Track(color, bounds : Rectangle, spriteTexture, triggerKey) =
    // ...
    member this.AvoidedObstacles
        with get() = avoidedObstacles
In Track.Update, after the loop which updates the obstacles, and before the last line which removes old obstacles and adds new ones, add this code:
    member this.Update(deltaTime, isKeyPressedSinceLastFrame) =
        // ...
        let oldObstaclesCount =
            obstacles
            |> List.filter (fun o -> not o.Visible)
            |> List.length
        avoidedObstacles <- avoidedObstacles + oldObstaclesCount
        // ...
This isn’t a perfect implementation. It won’t count an obstacle until it has disappeared off the left edge of the screen. It would be better to count it as soon as it has gone past Santa - but that’s more complicated, because we need to make sure we don’t count obstacles twice. Feel free to experiment with this, and let me know if you come up with a better solution!
Then in MakeSantaJumpGame.Draw, add this line just after spriteBatch.Begin(...):
    override this.Draw(gameTime) =
        // ...
        let avoidedObstacles = List.sumBy (fun (o : Track) -> o.AvoidedObstacles) tracks
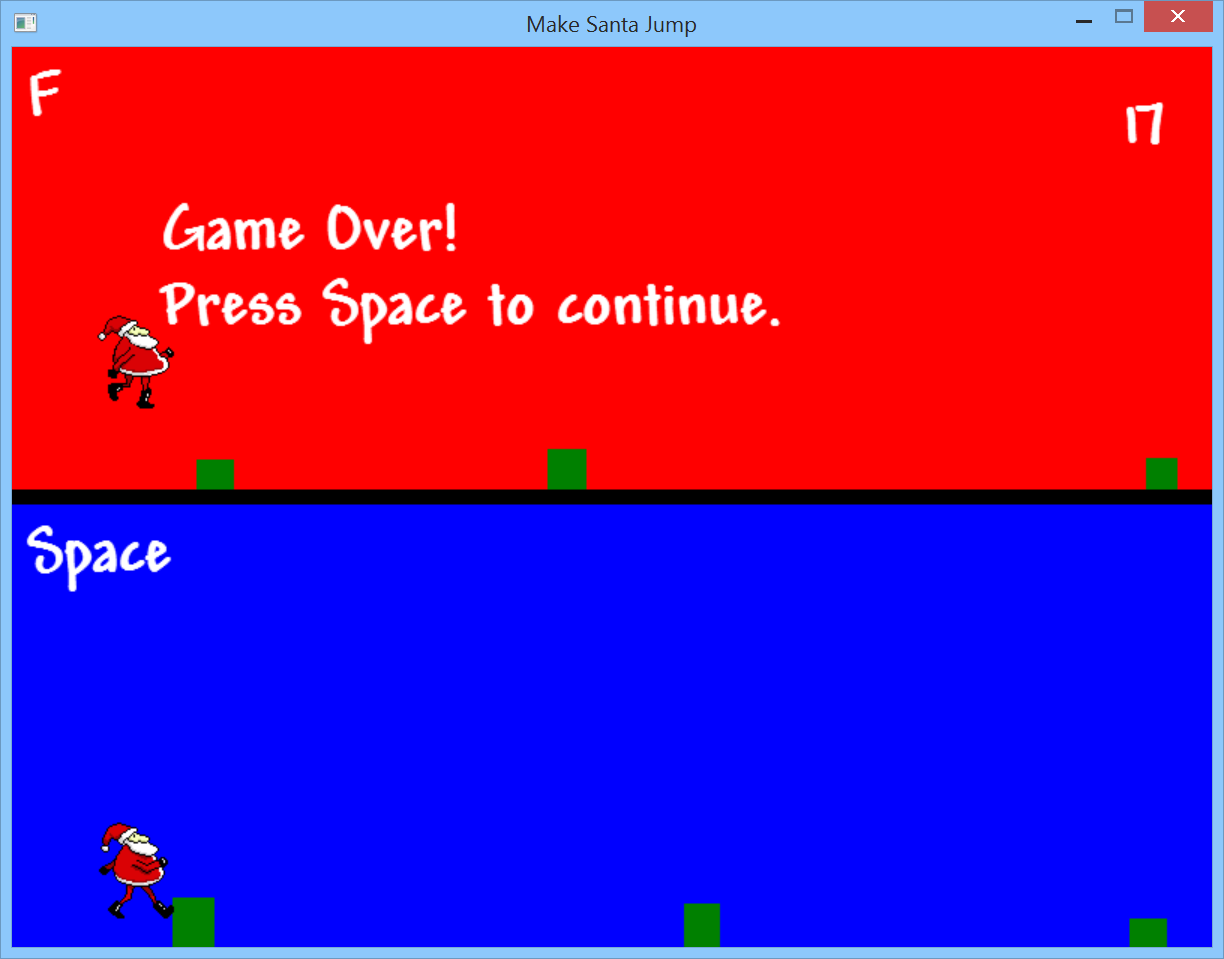
Finally, still in MakeSantaJumpGame.Draw, add this line at the end of both the Game/GamePaused and also the GameOver cases:
            // ...
            fontRenderer.DrawText(spriteBatch, this.GraphicsDevice.Viewport.Bounds.Right - 60, 30,
                                  avoidedObstacles.ToString())
Now run the game, and you’ll see the current score in the top right, both while playing the game, and also on the “game over” screen.
Conclusion
That’s it! If you’ve made it this far, well done! You’ve made a complete 2D endless runner game, in ~300 lines of F# code. Okay, there’s a lot that could be added to it - sound, perhaps a parallax background, nicer looking menus - but it’s playable as it is, and, I hope you agree, quite fun!
I ran out of time to run the game on a Mac prior to posting this, but I hope to do that soon, and then write a follow-up post. I expect that it will work without too many changes on both Mac and Linux, which would be pretty cool. It should even work on iOS and Android, although you’d have to make some adjustments - you don’t want to use keyboard input on mobile devices :)
Let me know in the comments if you have any feedback on the content or style of this tutorial. I’ve enjoyed putting it together - any excuse to make a game!
(As I was preparing this game and blog post, a somewhat similar game, Rudolph Runner, appeared on Hacker News. Rudolph Runner is a lot prettier than my game, but I think Make Santa Jump has the edge when it comes to difficulty. I’m not sure if that’s a good thing…)
Happy jumping!