An XNA 4.0 Content Pipeline processor for Terrain GeoMipMapping
Introduction
Geomipmapping was introduced by W. H. de Boer in 2000. Here’s what Wikipedia has to say about it:
Geomipmapping or geometrical mipmapping is a real-time block-based terrain rendering algorithm developed by W.H. de Boer in 2000 that aims to reduce CPU processing time which is a common bottleneck in level of detail approaches to terrain rendering.
If you want to have a medium to large terrain in your game, then you’ll need some kind of block-based terrain rendering algorithm, and geomipmapping is one of the easier ones to implement. I wrote an implementation several years ago. It served my purpose, but it was difficult for anybody else to integrate into their own game.
In attempt to solve that, and make it extremely easy for anybody to use terrain geomipmapping for their XNA game, I have refactored my implementation into an XNA 4.0 Content Pipeline extension.
Download
The project is called Osiris; it’s open source; and it’s available here:
The repository includes a demo project, which is a derivation of the GeneratedGeometry and ChaseCamera samples.
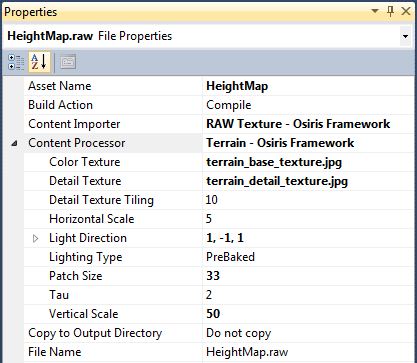
This is the properties pane for the heightmap in the demo project:

And here is ALL the code you need to write to add the terrain to your game. The TerrainComponent will take care of adjusting level of detail and drawing itself.
terrain = new TerrainComponent(this, `"Terrain\HeightMap");
Components.Add(terrain);
OK, I lied a little. The TerrainComponent expects there to be a service in the Game.Services collection which implements `ICameraService@:
public interface ICameraService
{
	Matrix Projection { get; }
	Matrix View { get; }

	float ProjectionNear { get; }
	float ProjectionTop { get; }

	Vector3 Position { get; }
}
camera = new ChaseCamera();
Services.AddService(typeof (ICameraService), camera);
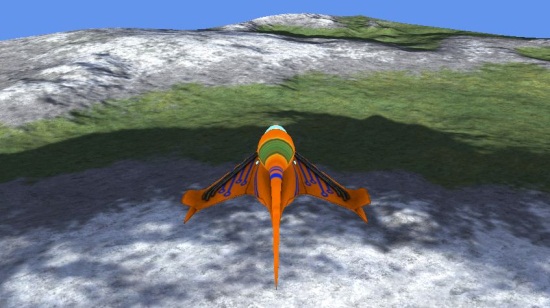
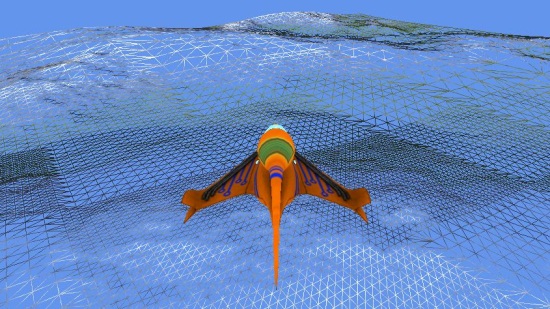
Here are some screenshots of it in action (use B to toggle wireframe in the demo):


The future
This is a pretty basic implementation - it uses DualTextureEffect to allow a base texture and a detail texture. I have intentionally used a built-in effect so that it will work with Windows Phone 7. This is something I’d like to get running soon, as I want to try out WP7 development.
At the moment there is no way of doing lighting calculations. You can’t use vertex normals, because geomipmapping changes which vertices are rendered from frame to frame, so lighting based on vertex normals would be “popping” constantly. I intend to calculate lighting at build-time. I’d love to get some feedback on the basic implementation first, though, before getting too far into that.
Most of the structure is in place to do frustum culling on individual patches, but I haven’t yet written the code to actually do it.
An aside on the name
The eagle-eyed will notice that I have previously used the name “Osiris” for another game-related project. You may also notice a two year gap between that blog post and the next one. That attempt at writing an all-encompassing scene graph pretty much wiped me out for 2 years as far as hobby development went. I got overwhelmed with the size of it and wasn’t having fun. I am now older and not much wiser, but I do know that smaller projects are more enjoyable. I’m also much more likely to finish them, given that I do this stuff in my free time, and have less and less of that. So this new appropriation of the name Osiris is the direction I’ll be going with game development - small bits of functionality that are usable by themselves, and hopefully useful to others. And hopefully the odd game…